To Add or Remove a consultant login go to the Settings screen, via the top right corner menu, and click “Manage Consultants”.
On the Manage Consultants screen you can add, remove or edit consultant details.
Adding a Consultant
To add a new consultant click on the ‘Create’ icon in the top right corner of the Manage Consultants screen. This takes you to the creation screen.
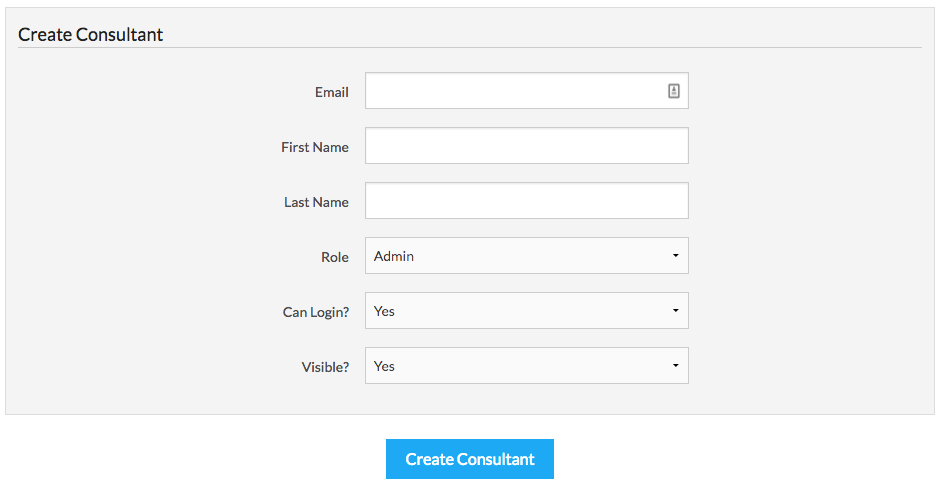
On the creation screen, fill out the email, first name and last name of the new consultant.
Then select the consultant’s Role from the drop-down and click ‘Create Consultant’.
The Role specifies the level of permissions assigned to the new login. The type of Roles are:
-
Admin this is the highest level of permissions, allowing the user to customise any setting for the account, as well as adding or removing consultants and changing billing details.
-
Manager this level does not allow global customisations or editing of billing details but does allow the user to run reports and view KPIs across all consultants.
-
Consultant this is the level of permissions suitable for most user. With this level of permissions the user will be able to manage candidates, clients, roles, etc but not view reports or statistics across the team of consultants.
Note that when adding a consultant your billing will automatically be updated to reflect the extra license.
Editing and Disabling Consultants
To edit or disable a consultant click on the name of the consultant on the Manage Candidates screen. This will open up the edit screen for that consultant.

Here you can update the email, name and role of the consultant. Once done click “Update Consultant” to save your edits.
To disable a consultant, change the “Can Login?” value to “No “. This will will disable the consultant login. To remove the consultant from drop-downs, filters, etc change the value of “Visible?” to “No” as well .
Note that when you disable a consultant login will automatically update your billing status with the reduced license count.